Main invoicing options
Invoicing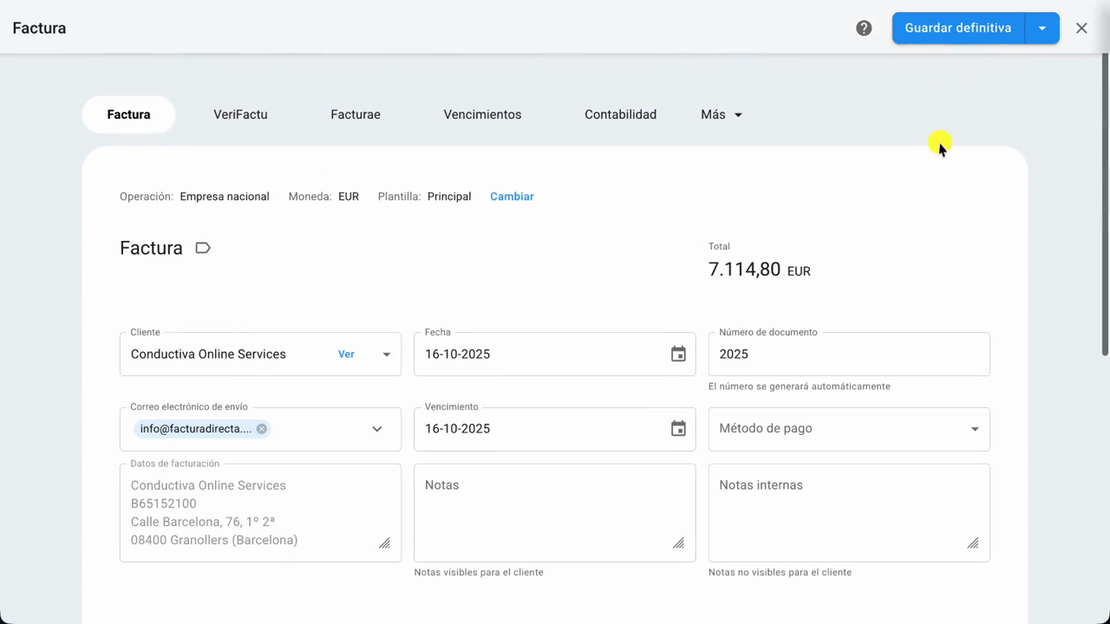
Learn about the main options of an invoice
Learn in detail all the available options when creating an invoice in FacturaDirecta. We show you the main features and how to make the most of them to create professional and complete invoices.
Video transcript
Welcome to this tutorial where you'll learn how to create an invoice in FacturaDirecta. To get started, access the invoices section from the top menu. Here you'll see the list of all your invoices. When you want to create a new invoice, simply click on the new invoice button. The new invoice form opens.
As you can see, the main tab has all the essential fields. The invoice date that comes pre-filled with today's date, the invoice number that will be automatically generated when saving, the customer we'll select, the due date, the email for sending and the payment method. Everything is organized intuitively so you can create your invoice quickly.
Now let's create a customer. Click on the customer dropdown and select the option, create new customer. Here you enter the customer's basic information, the name, tax ID, address, city, postal code and email. The system automatically fills in the province based on the postal code. Once the data is completed, click save and the customer is associated with your invoice.
Now let's add the invoice lines. If you want to work with products, click on the gear icon at the top right of the lines. Here you can enable or disable the columns you need, such as the product column. Let's enable the product column. And in the first line, click on the product field where we can select a product or create a new product.
We select a product and the line is automatically filled with all the data. The description, quantity, unit price and tax. You can change any field, including the VAT type if you need to. You can also add lines without needing to create a product. Simply enter the description, quantity, price and tax directly.
As you can see, the system automatically calculates all amounts and shows you the summary with the subtotal. The VAT and the invoice total. Once all data is reviewed, click save as final. The system automatically generates an invoice number following your sequential numbering. If you have VeriFactu configured, you can see the information and QR code in the VeriFactu tab.
This invoice is now ready to send to your customer. Now you can print the invoice as PDF by clicking print or send it directly via email to your customer with the send button. The customer's email is already entered automatically, you just need to confirm the sending. And done, that's how easy it is to create an invoice in FacturaDirecta.